|
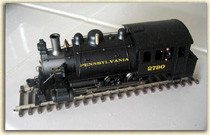
I have a tonne of model trains,
about 60 engines, and 300 cars - yet I had no place to view
them and they were all stuffed in boxes. So I decided to make
a small (ahem) display case that could show them off. At least
I could see them.
Then I thought,
"Well that's dumb, I mean, it would be so much better
if I could run them." Since I live in California, and
the stupid builders don't put basements in houses here, I
didn't have any place to put a train set. Included in this
was the fact that I have two clawed cats that shred anything
that moves - cat toys, pens, socks, exposed toes etc. Combining
these frustrations, the Overhead Acrylic Train Layout was
born.
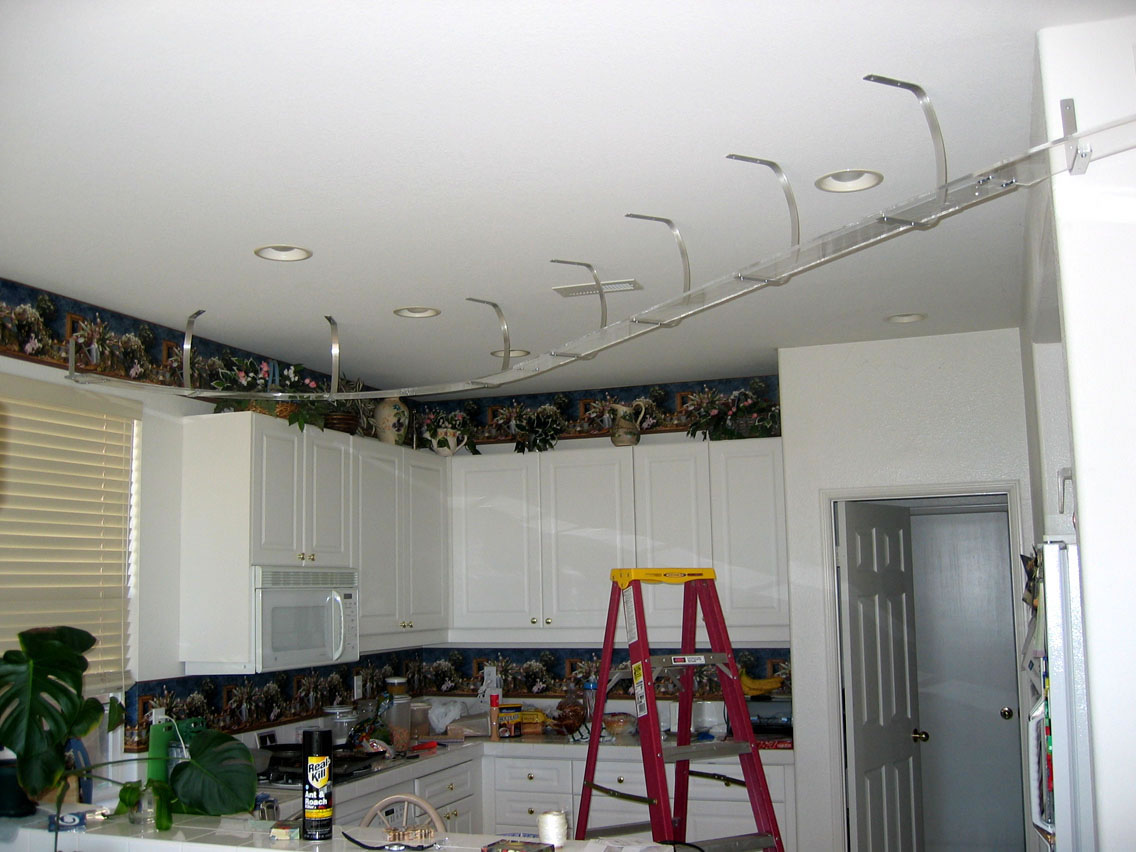
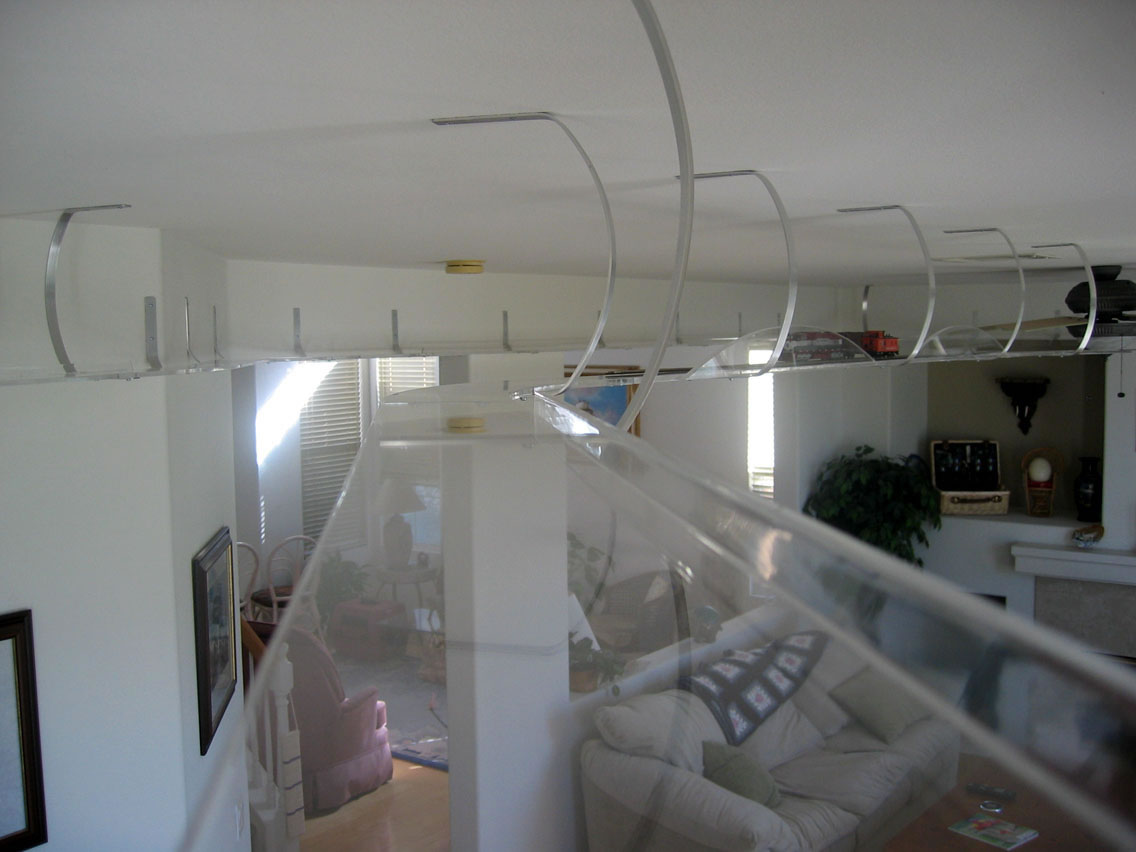
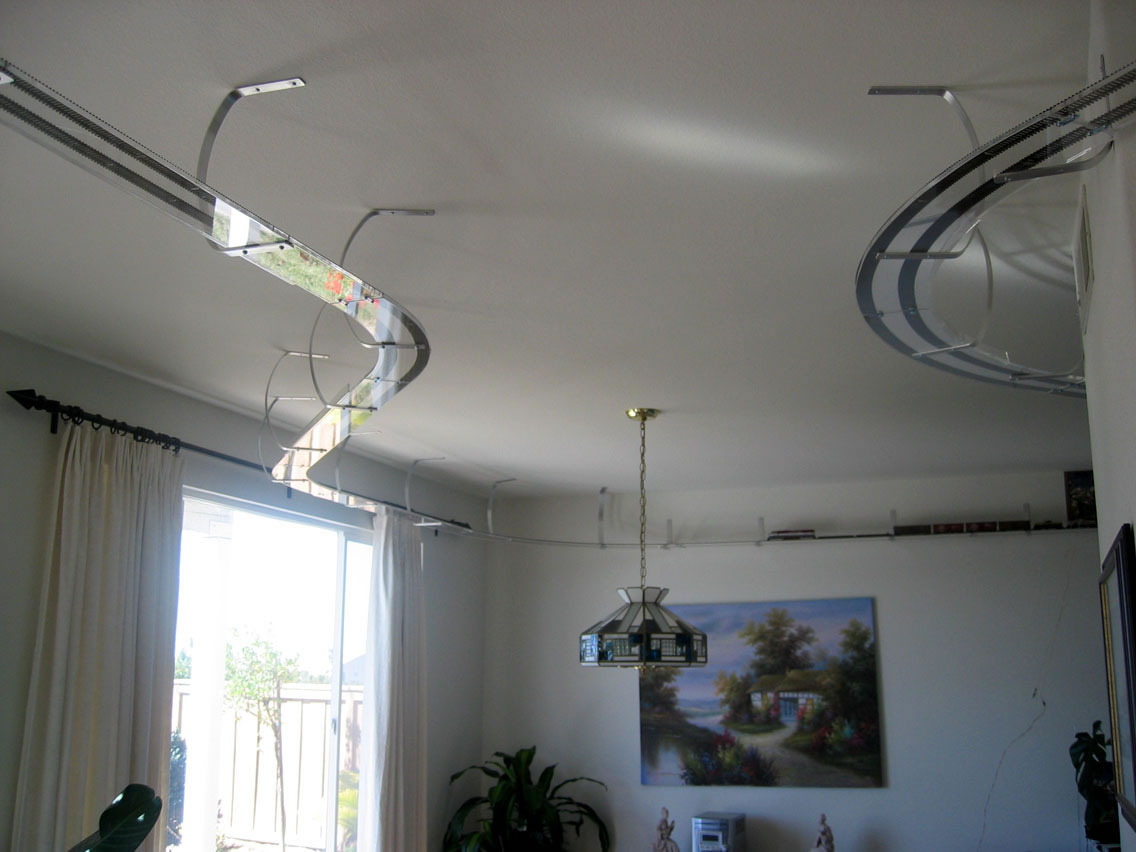
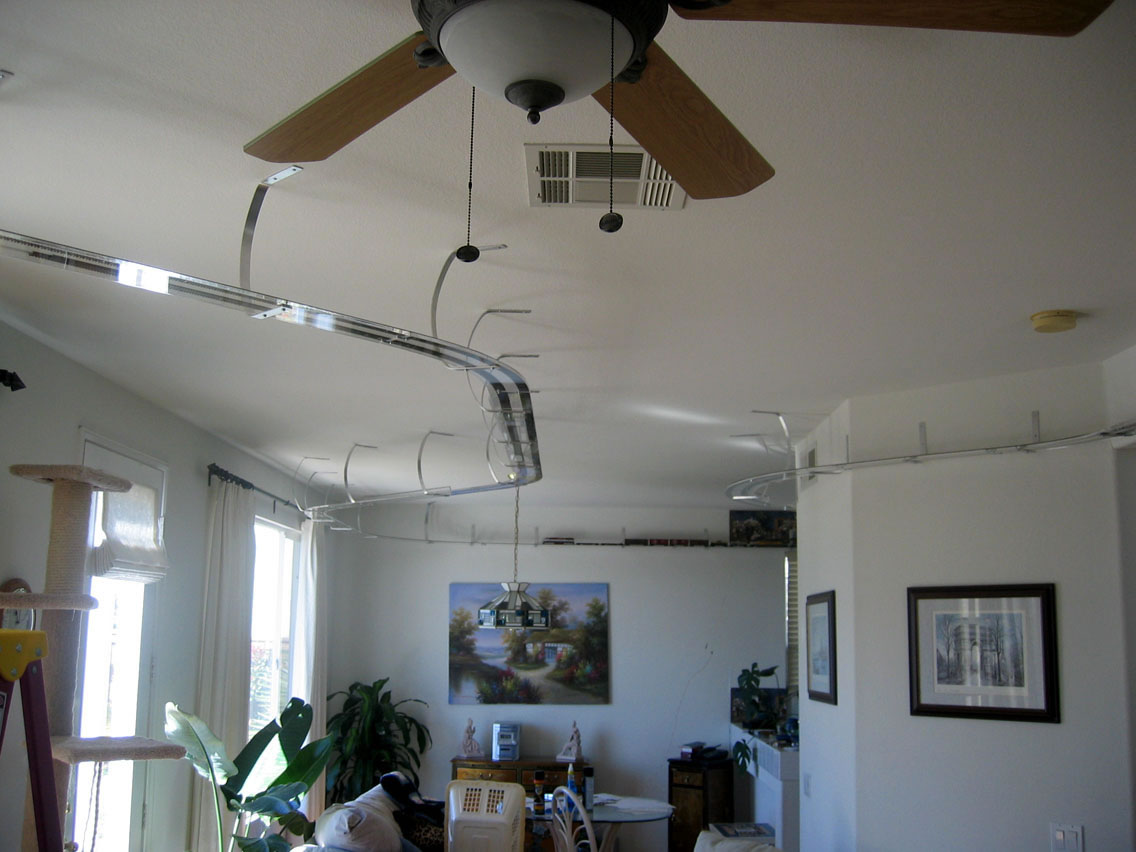
The layout was to go from
the kitchen to the dining room area, over to the fireplace
and back. I figured if I was going to put up all the brackets,
cut all the plexiglass and install a full train set, I should
make it 2 tracks wide instead of just 1. I measured the appropriate
distance of plexiglass width to be 4.5 inches. This would
give me plenty of space to put 2 HO scale tracks side by side.
Yeah I know, I really need
to get some friends.
The first thing I needed
to do was obtain all the skills and run tests on if this would
work or not. I needed to design the brackets or at least figure
out where to buy the suitable brackets.
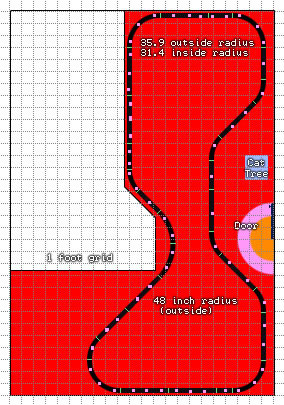
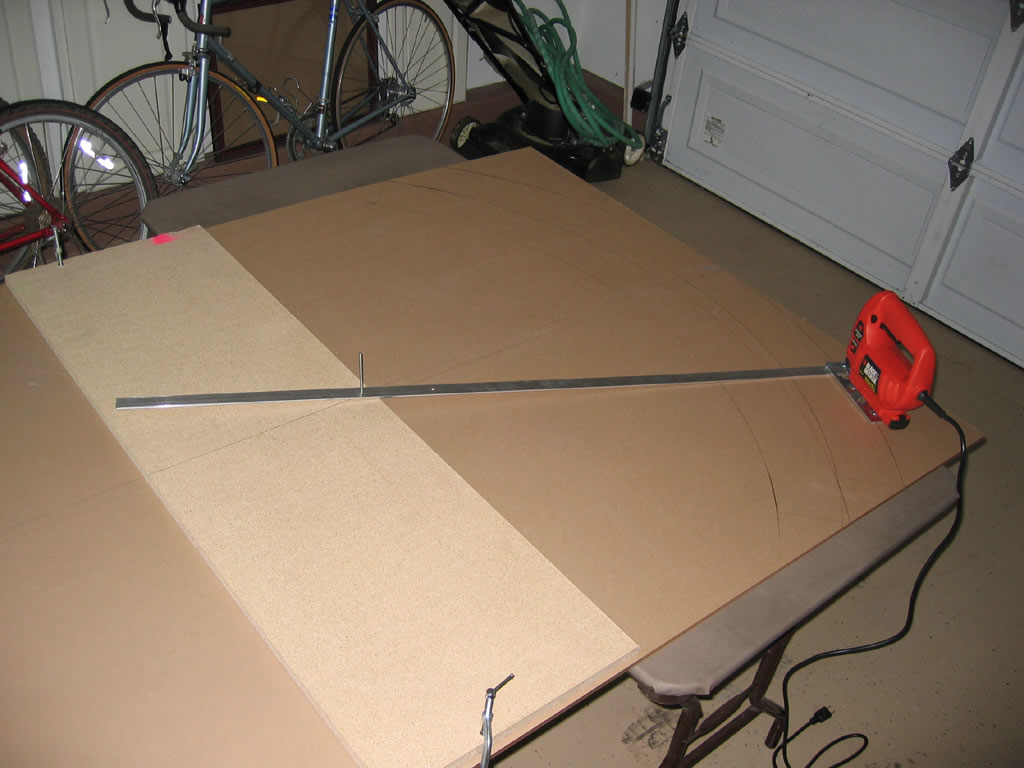
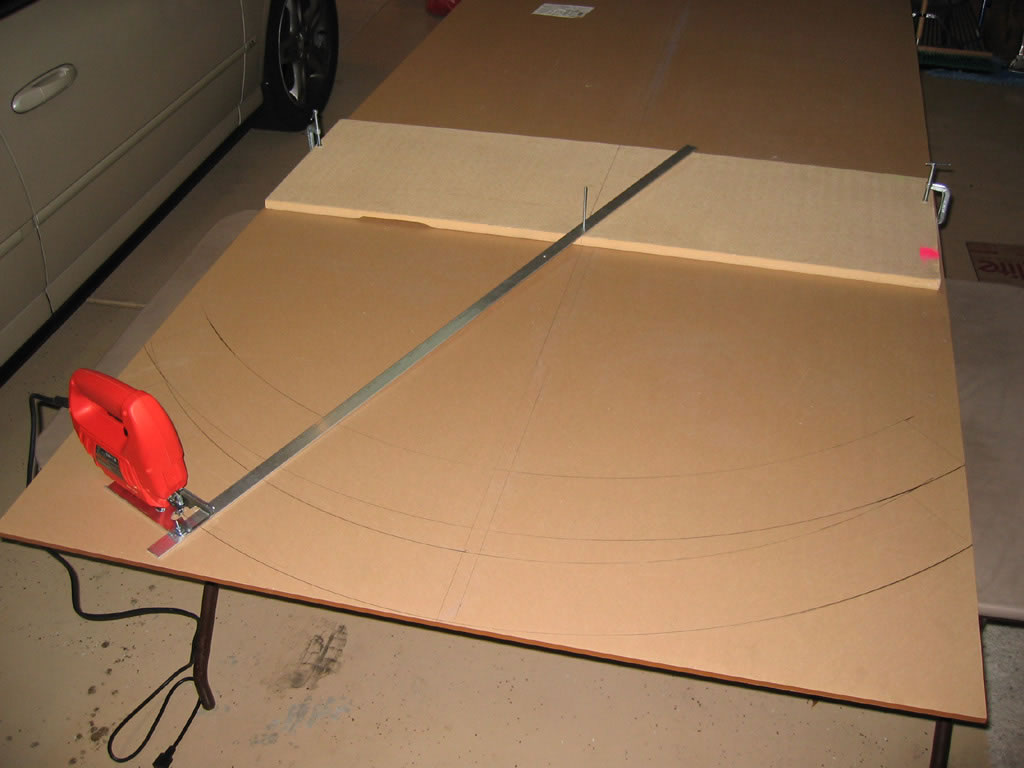
The design of the layout
was done in Photoshop, with a 1 foot grid. This gave me the
chance to play with radius and distance and see how it all
works out. While designing it, I could figure out how far
from my cat tree it needed to be so that cats wouldn't jump
on it, and how far it needs to be from the door.
This also showed me which areas would be suspended,
and which could be mounted with an L bracket on the wall.
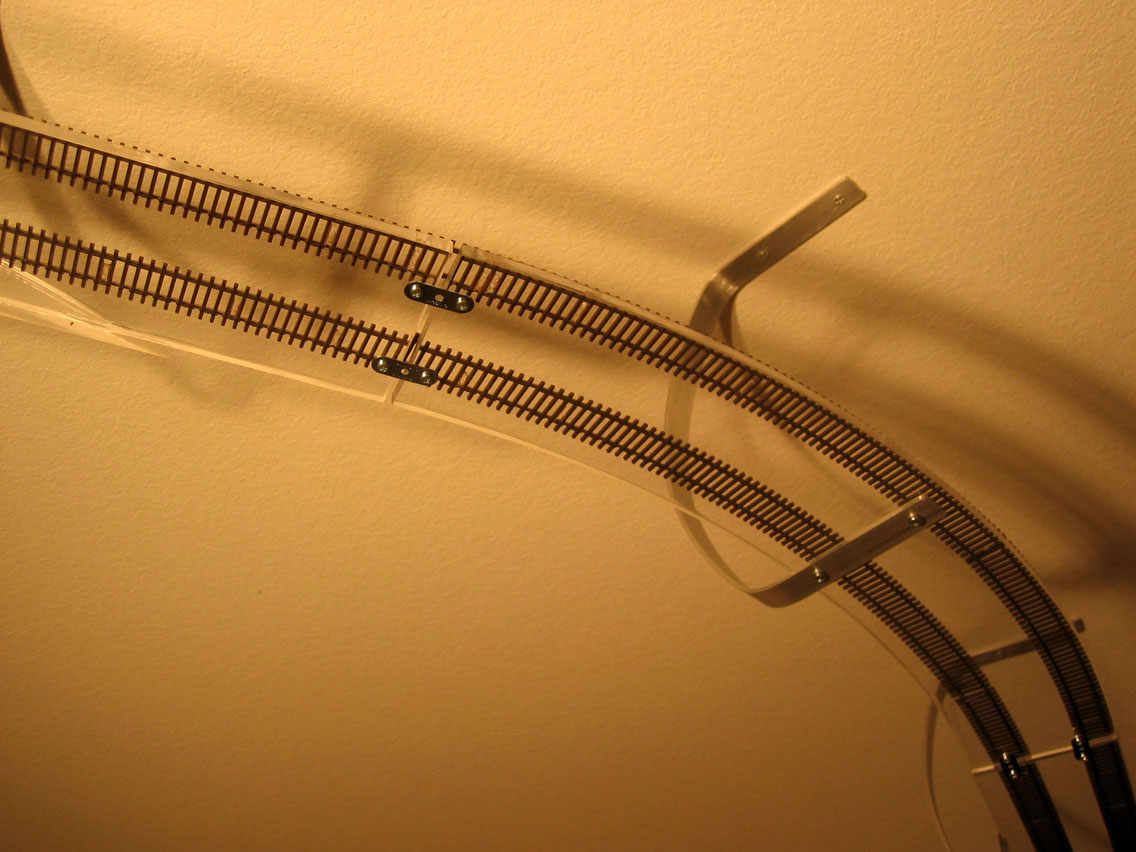
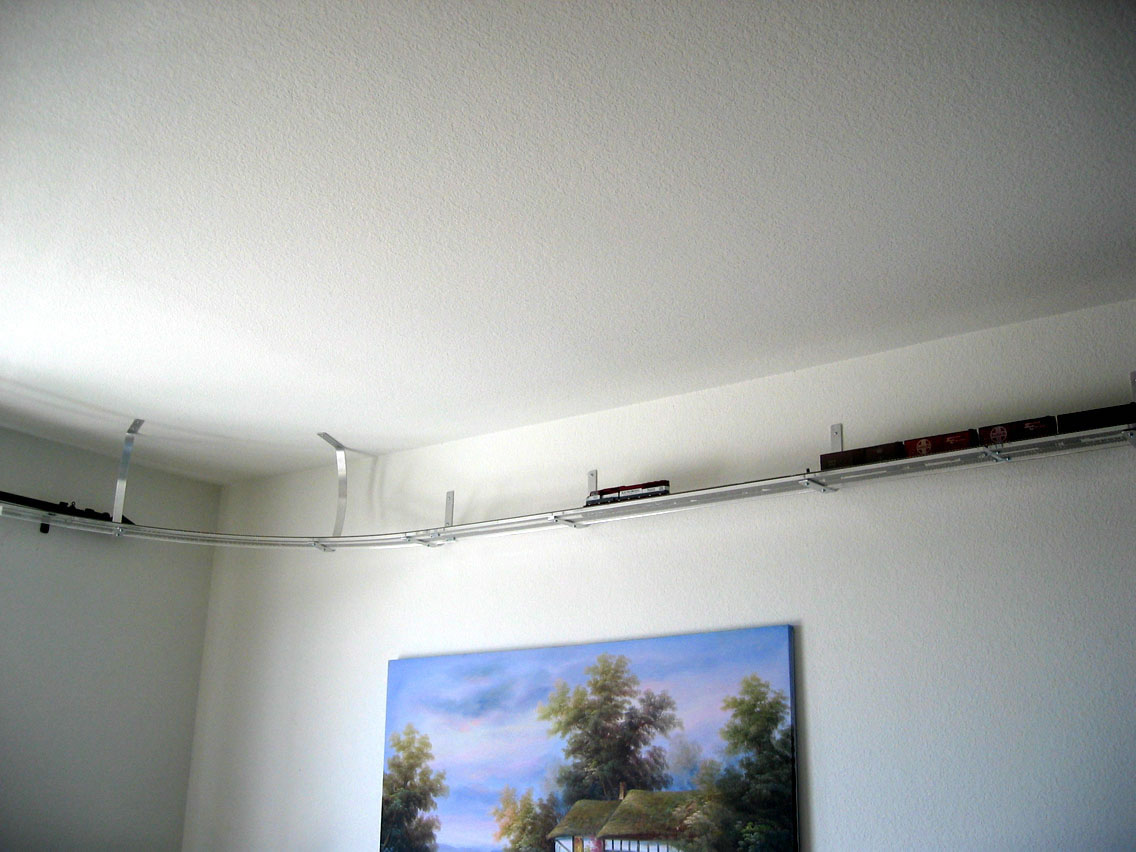
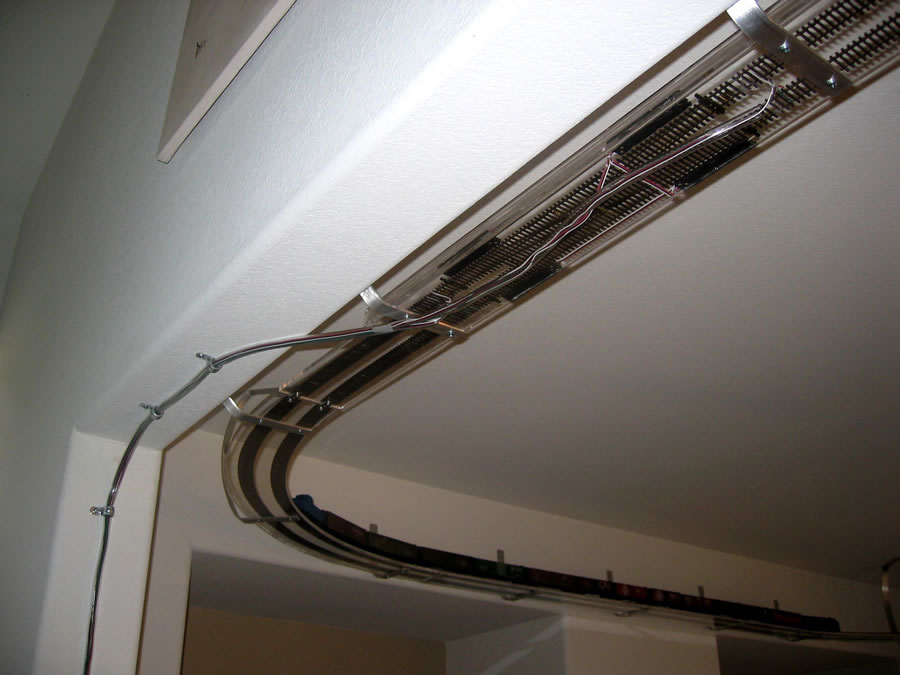
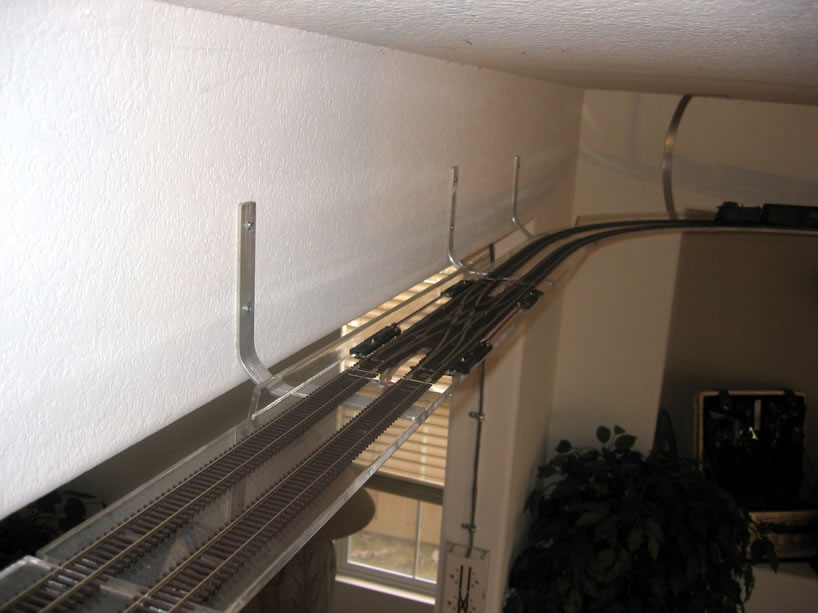
The final design had 180 feet of track, in two 90 foot routes.
When I looked around for wall brackets, I didn't
find anything that would be suitable. I could only find fancy
L shaped brackets that were too expensive,
and nothing for the suspended area. I was planning on using
two 1 foot bolts on either side of the track to hold the suspended
area (you can buy 4 foot threaded rod at Home Depot), but
didn't like the idea that the track would be enclosed.
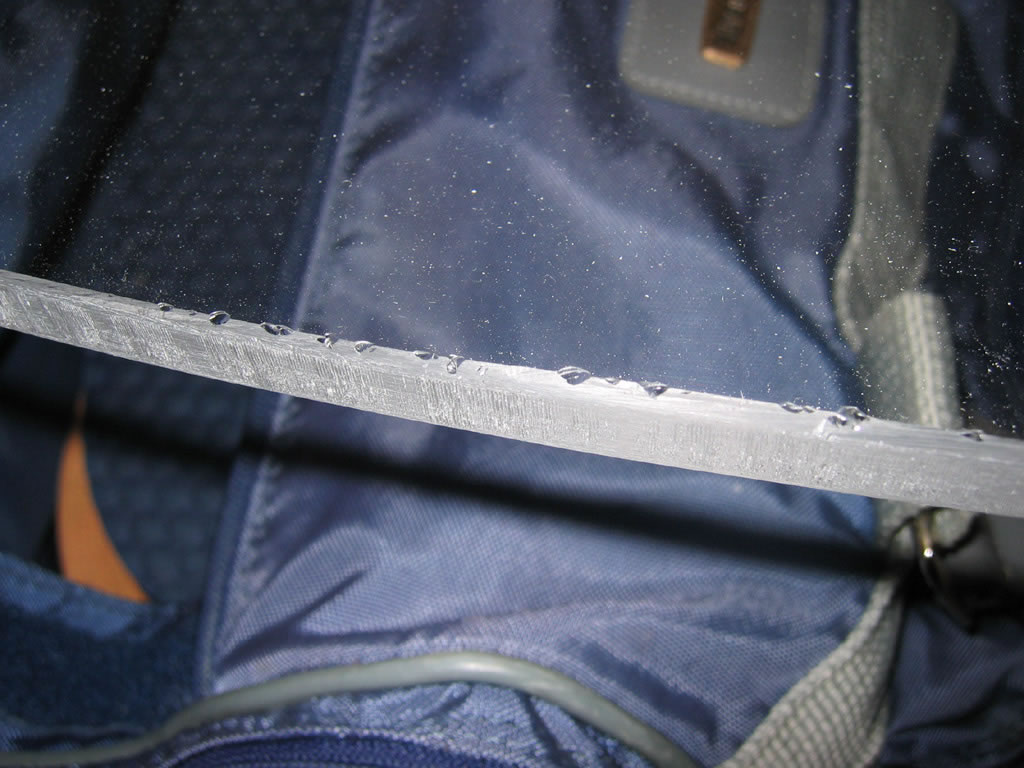
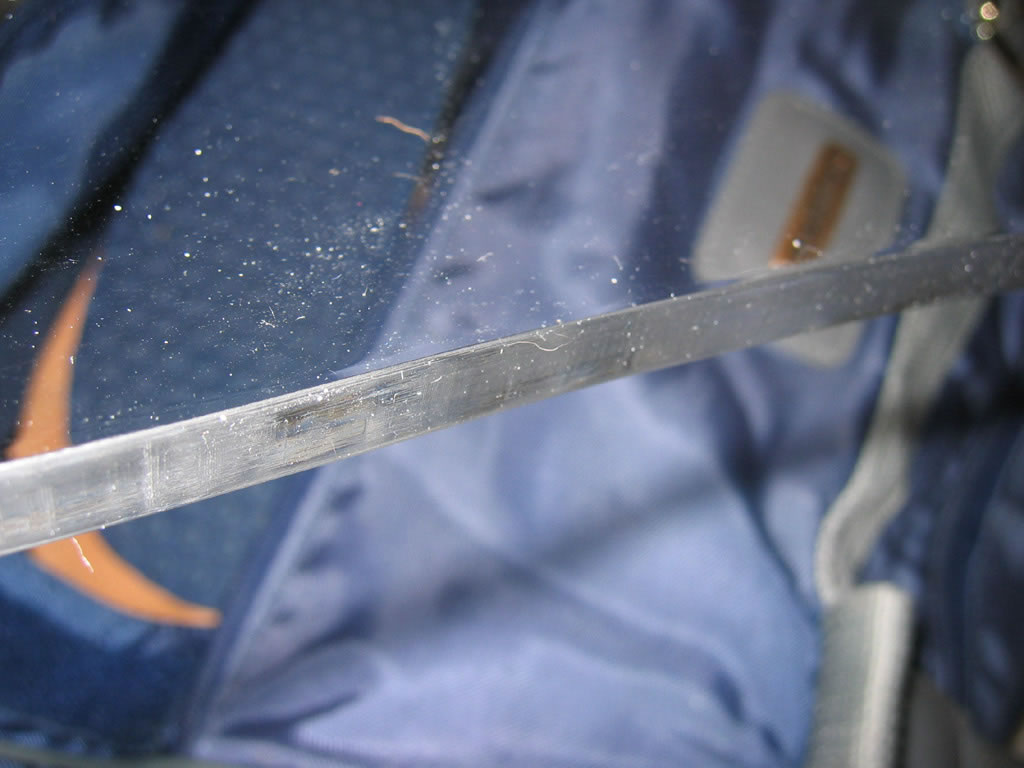
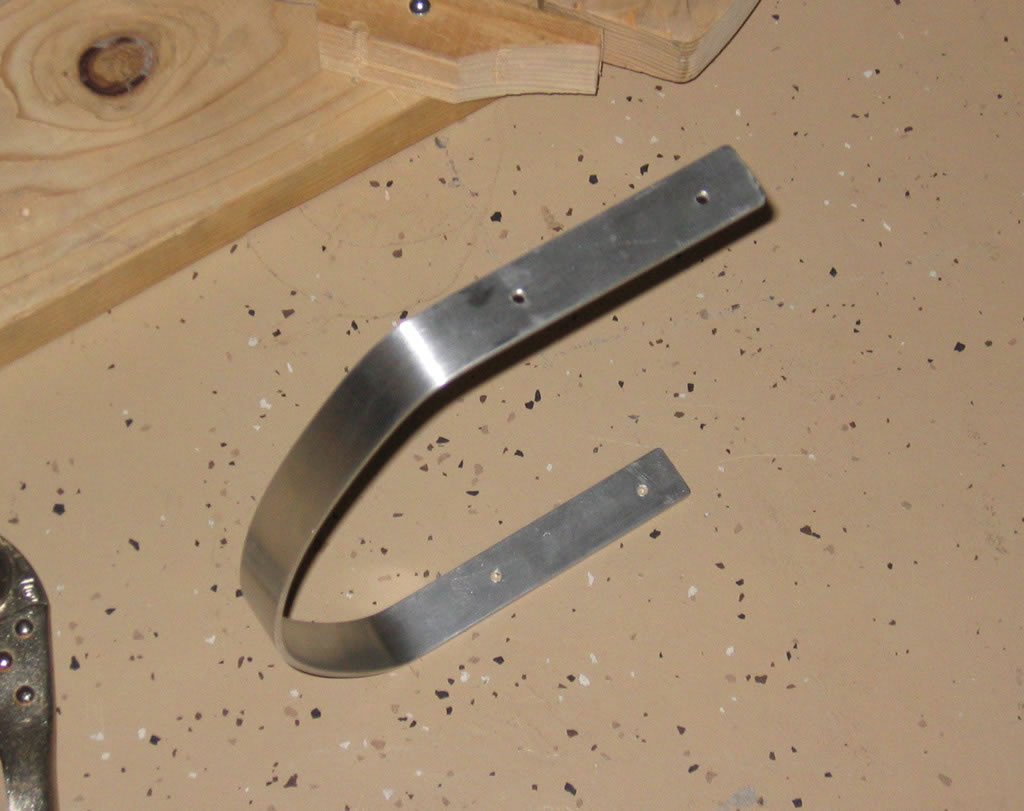
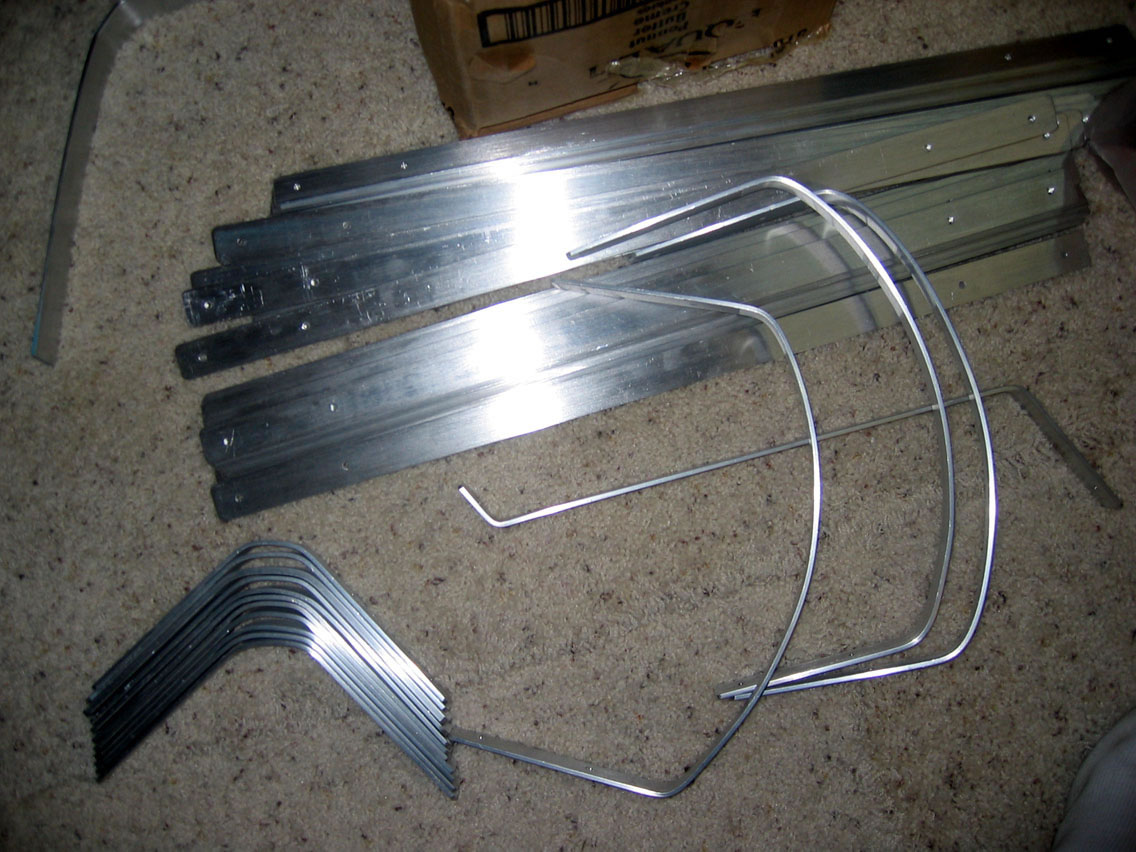
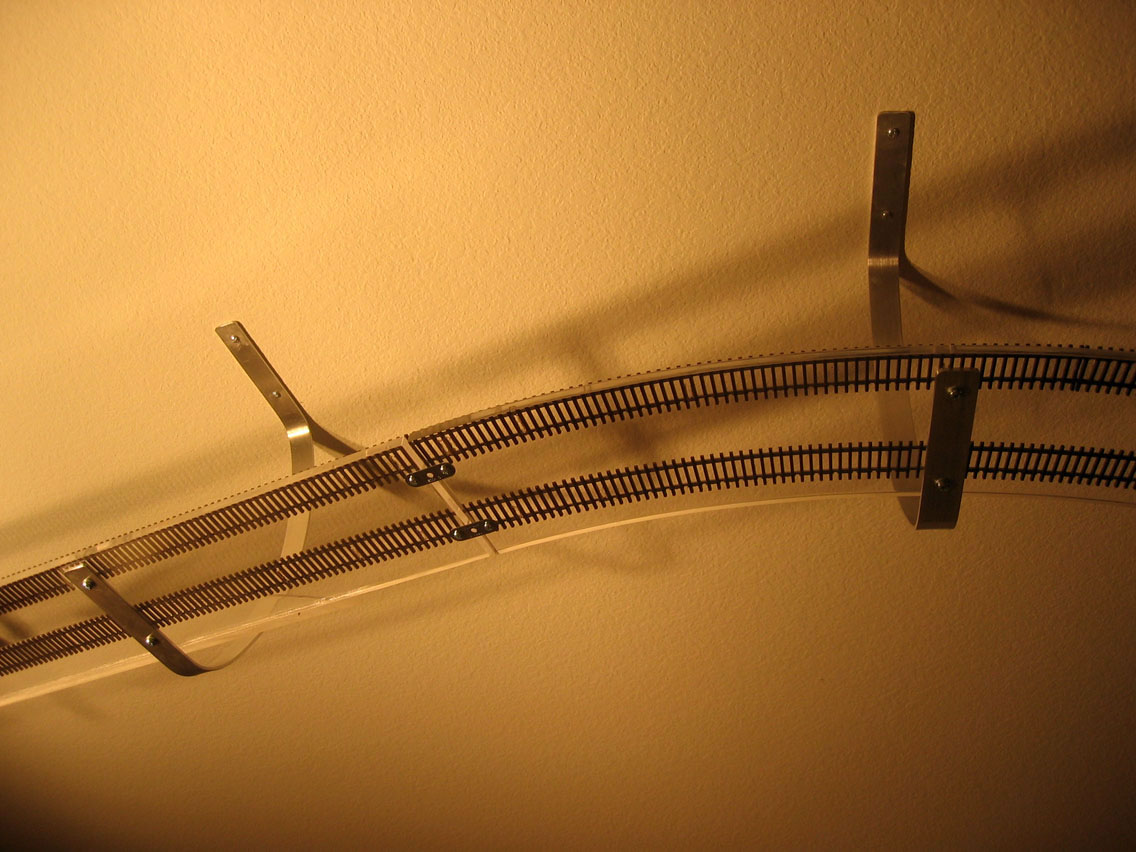
Then I came across 1" flat stock aluminum
in the store, and thought of the idea for the C shaped bracket.
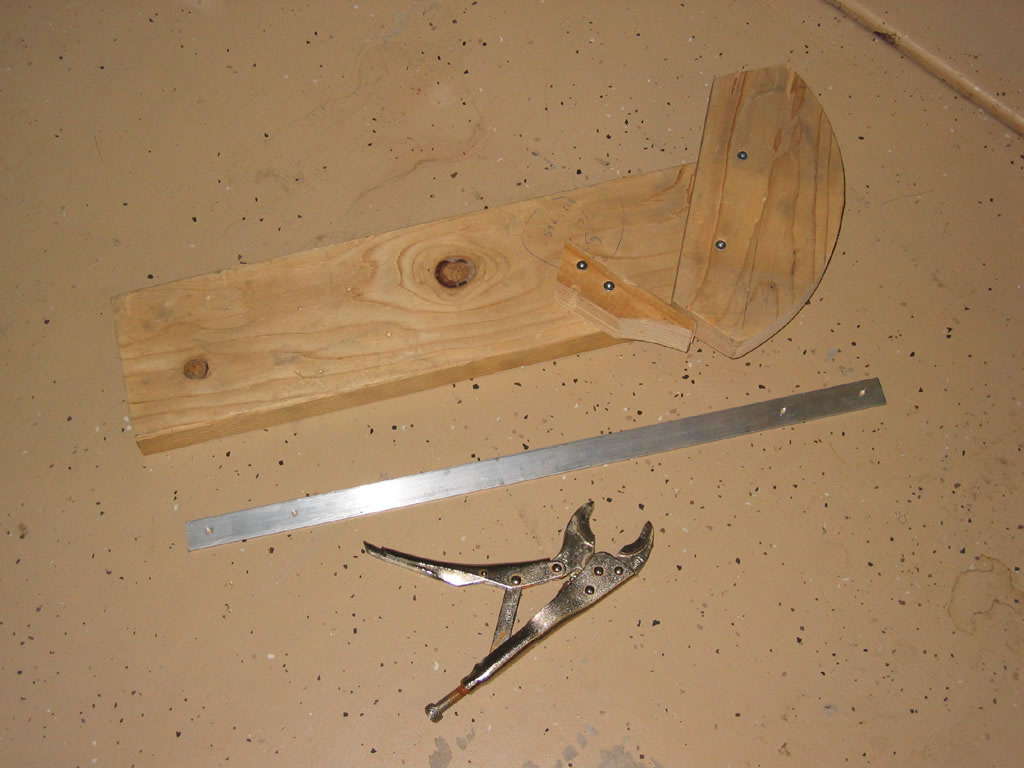
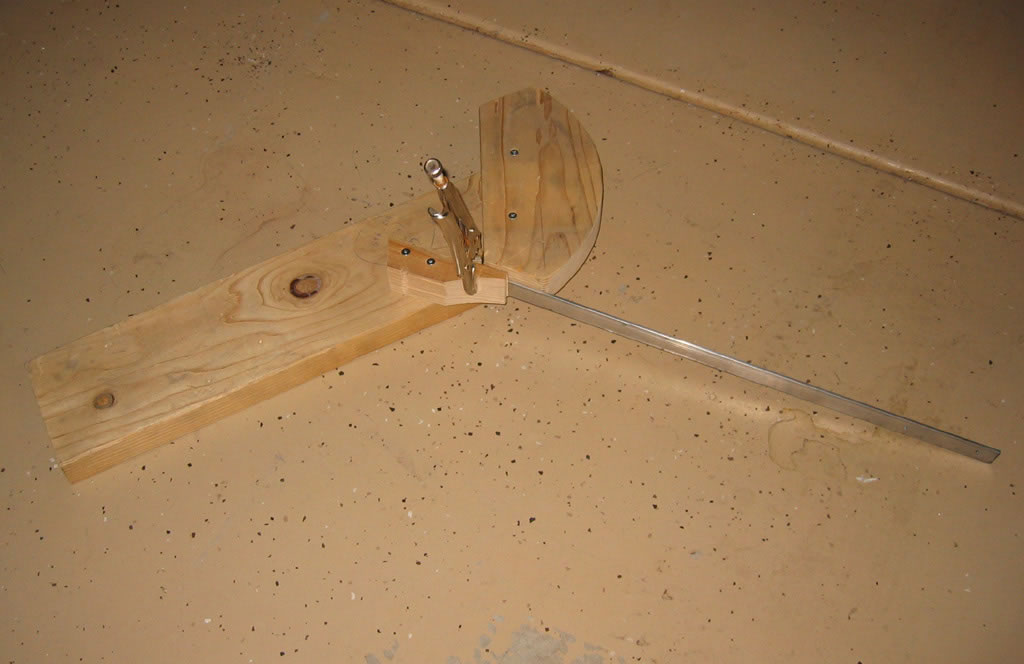
I bought one 6' length and took it home. From this, I practiced
making a bracket, and tested how strong it would be and how
much it would flex.
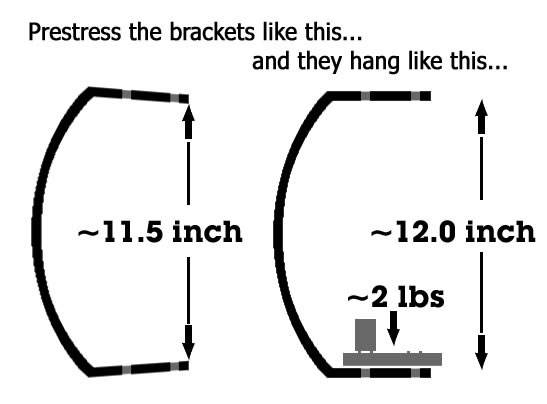
From my tests, I determined that brackets would
have to be 2 feet apart MAX, and that I needed to pre-stress
them to compensate for the weight that would be placed on
them.
However the initial tests showed that the C
brackets were VERY springy, and really bounced around when
I put a 4 foot piece of plexiglass on it - even without a
train. At first I was really worried about this, and thought
my brackets wouldn't work. But since the train set has many
curves in it, the brackets all hold themselves together and
there is no bouncing in the final setup.
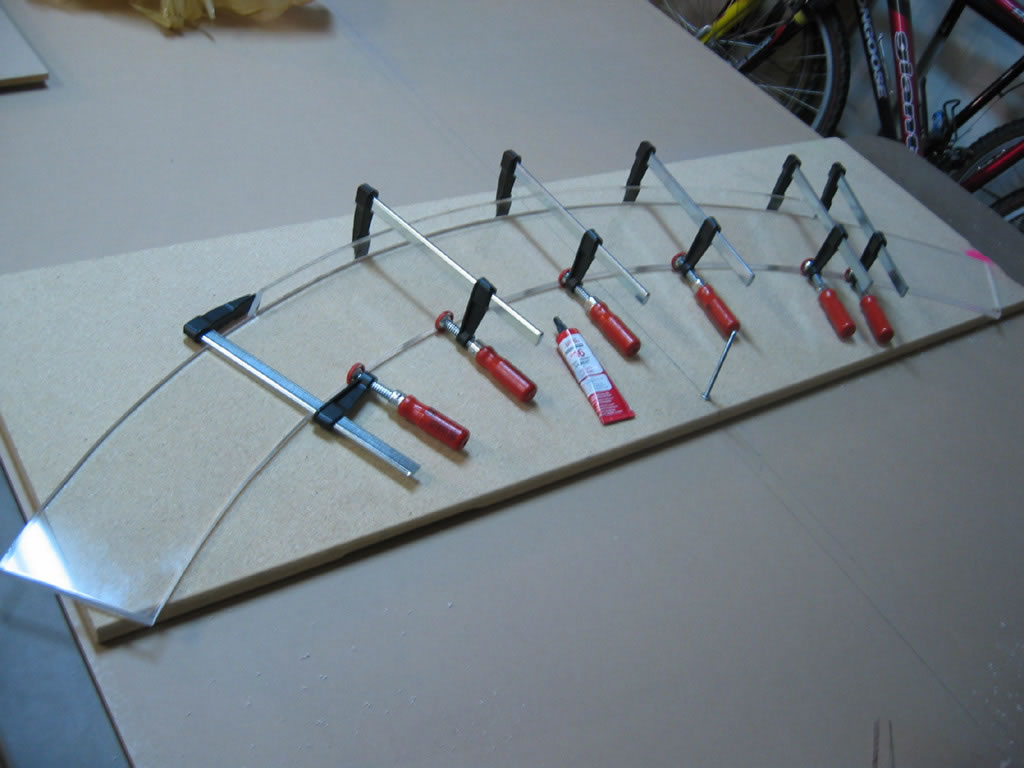
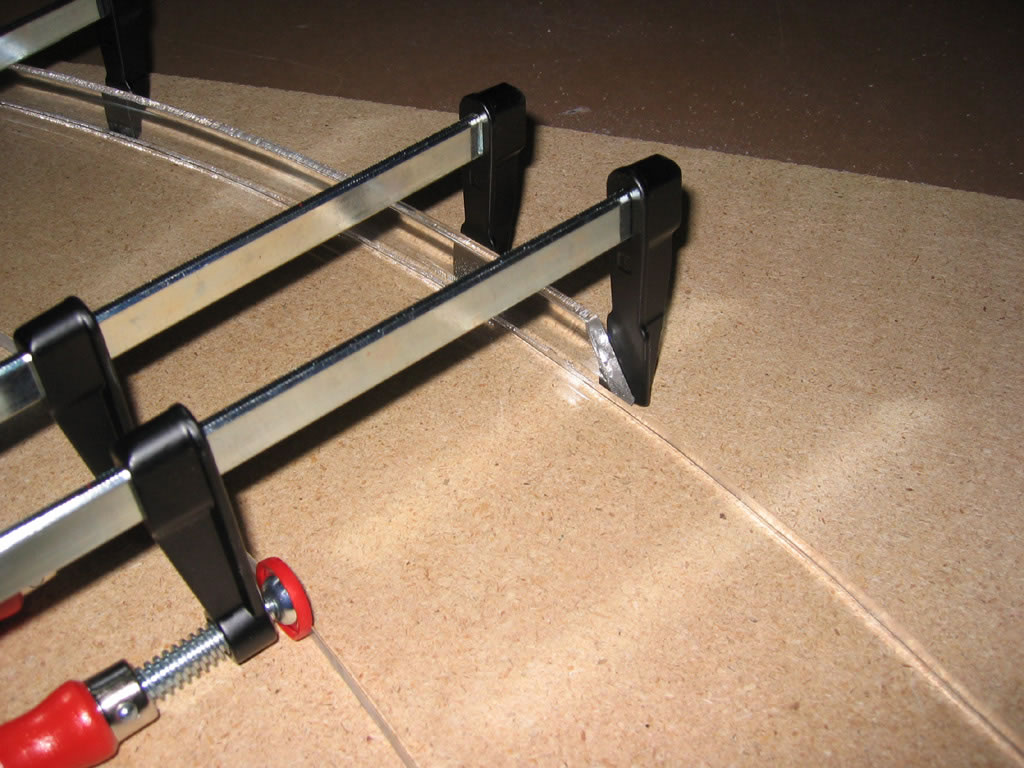
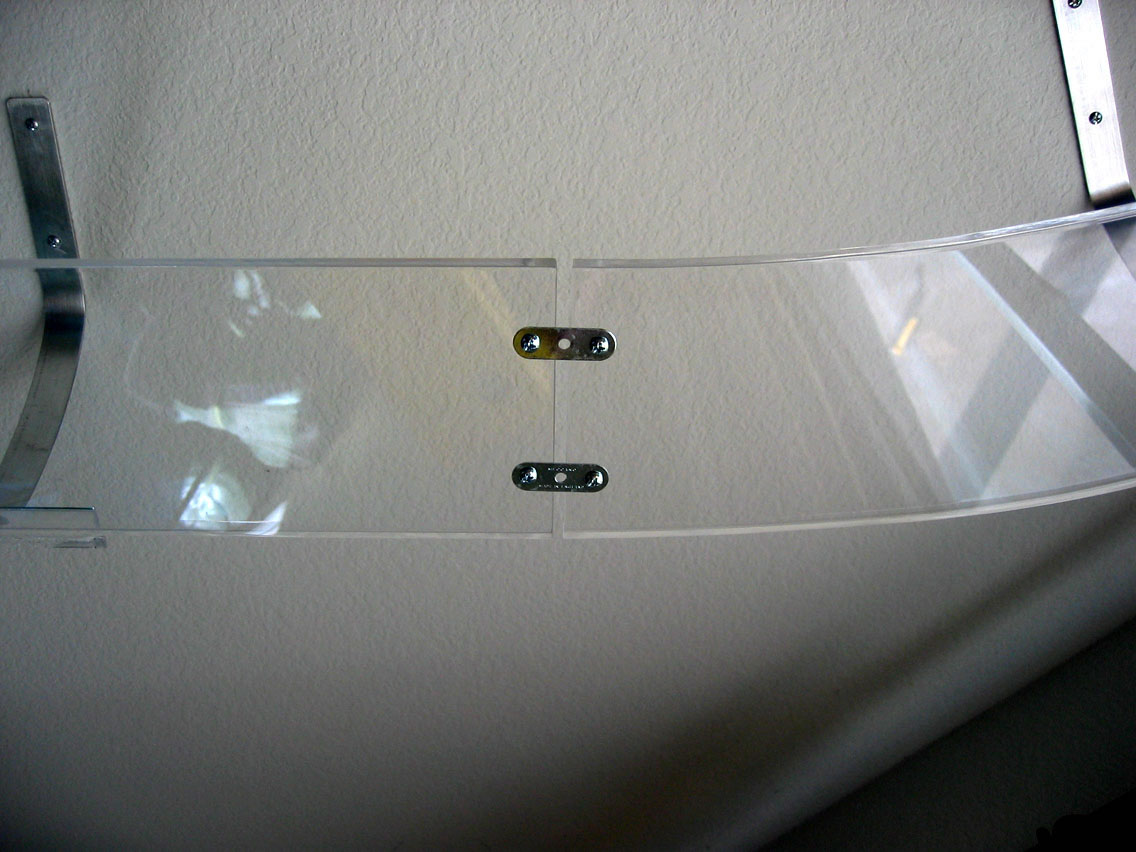
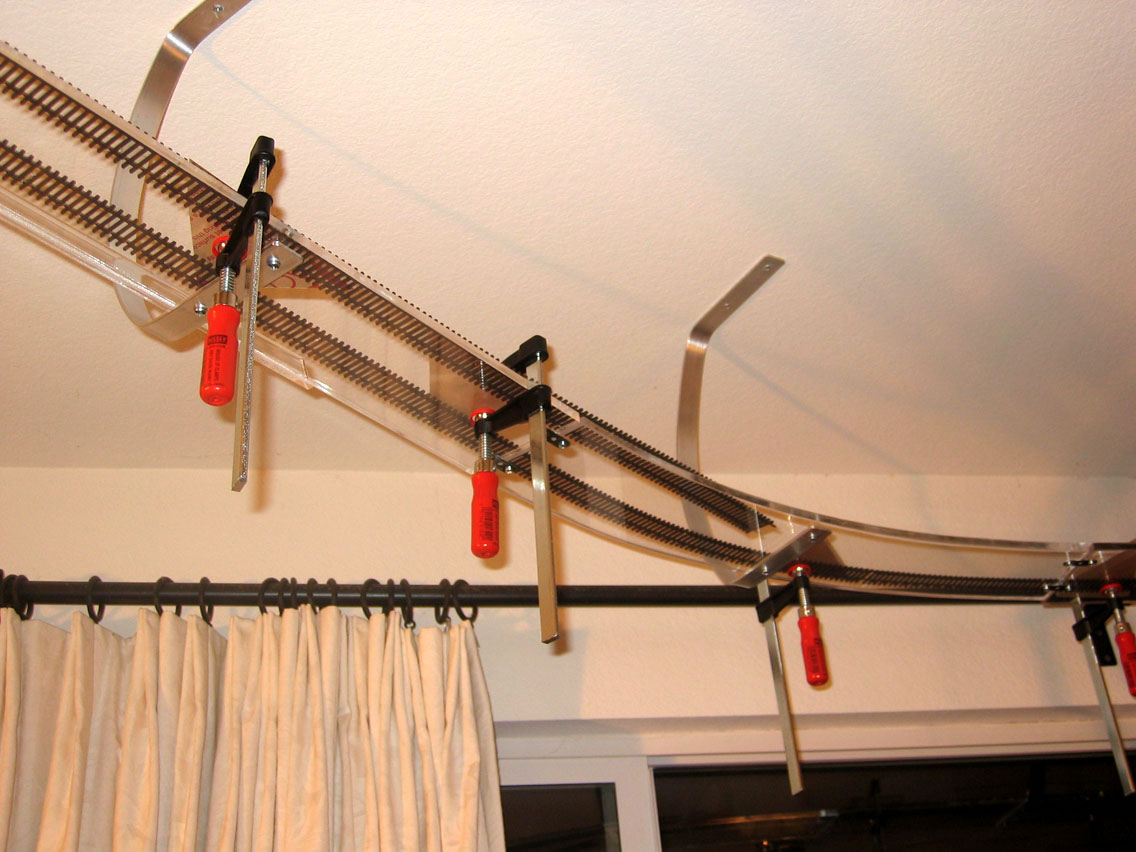
The plexiglass also posed problems with bouncing.
Even though I had 3/8 inch plexiglass, it still sagged in
the middle when I tested trains on it. I put blocks under
a test piece of plexiglass spaced at two feet, then put some
sample engines on it. I needed to put supports on the backside.
The supports made the plexiglass very sturdy,
but it posed a secondary problem that I didn't expect: Since
the plexglass was 4.5" wide, trains would have room to
curve without hitting each other as long as the track was
placed right near the edge of the plexiglass. But now with
a backside support, I couldn't put the track on the edge,
and the trains were in danger of colliding.
If I was to do the train set again, I would
make the plexiglass 4.5 inches on the straights, and 5.5 inches
on the "curves that require backside supports".
Not all curves required supports, only 90degree curves had
supports. The 45degrees curves were short enough not to sag.
The straight parts had backside supports, but trains going
straight have no problems colliding when they get close.
The final combination of C brackets and "plexiglass
with backside support" is very strong and sturdy.
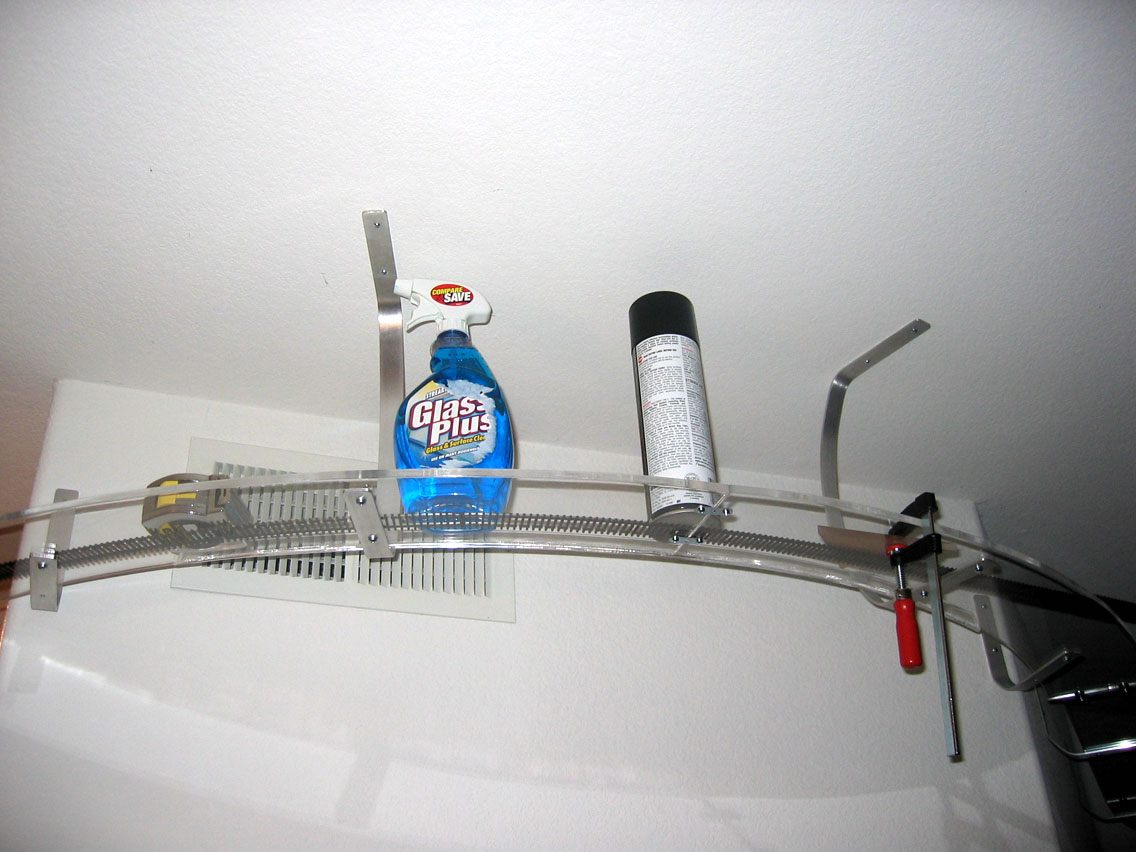
I put 6 re-railers around the set. If the train
comes off the track, which it will, at least it has some chance
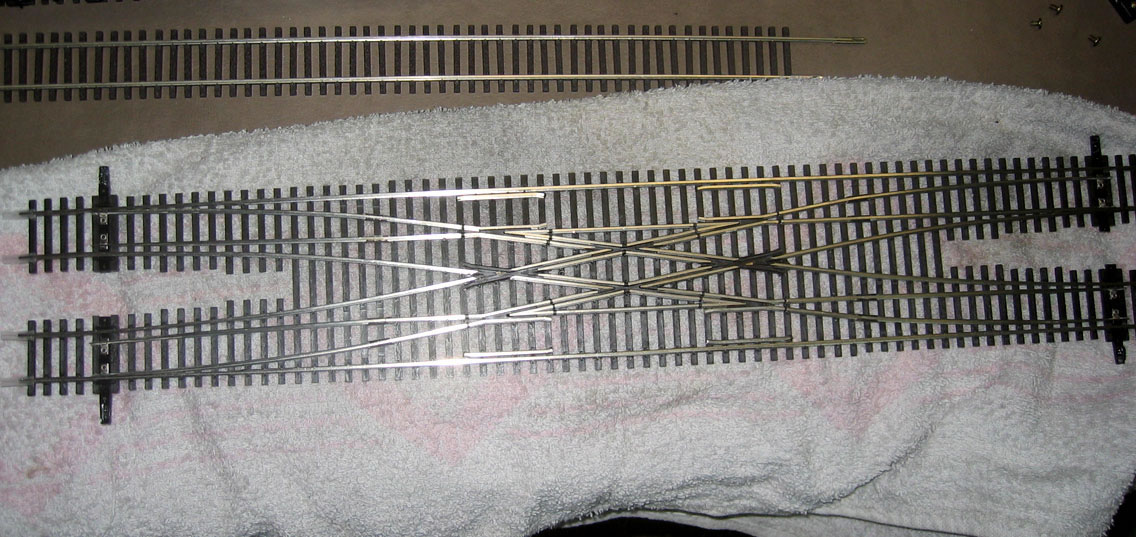
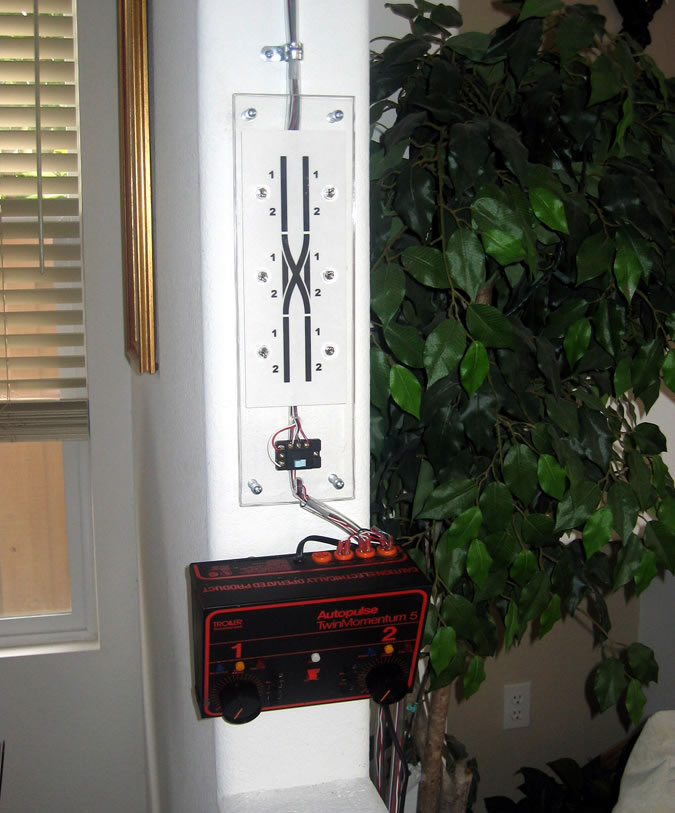
to get back on. The set also included a double-crossover that
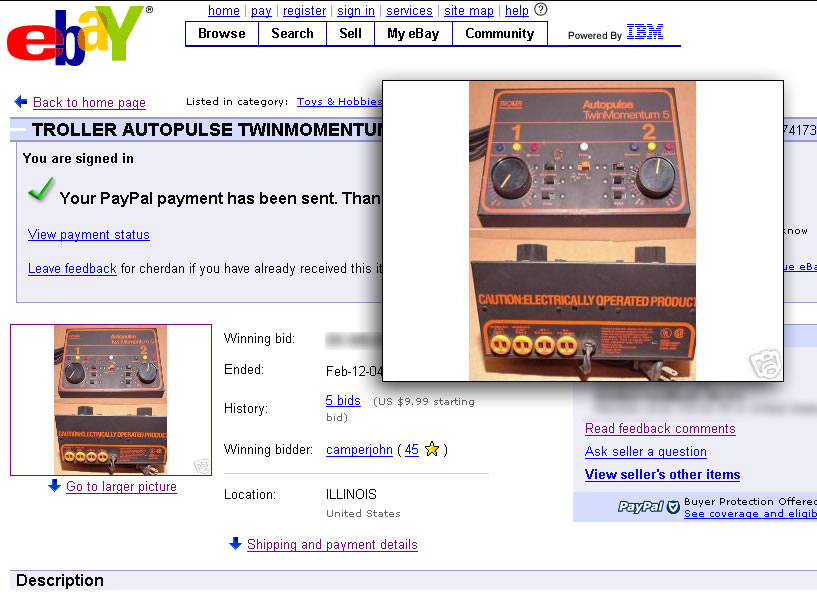
I can switch trains from one track to the other. I bought
a double power supply off of ebay that matched the type my
Uncle had on his basement set, 25 years ago.
The wires are all encased in plastic tubing
to continue with the clear plexiglass theme. The control panel
is also made out of plexiglass, and mounted with aluminum
cylindrical spacers.
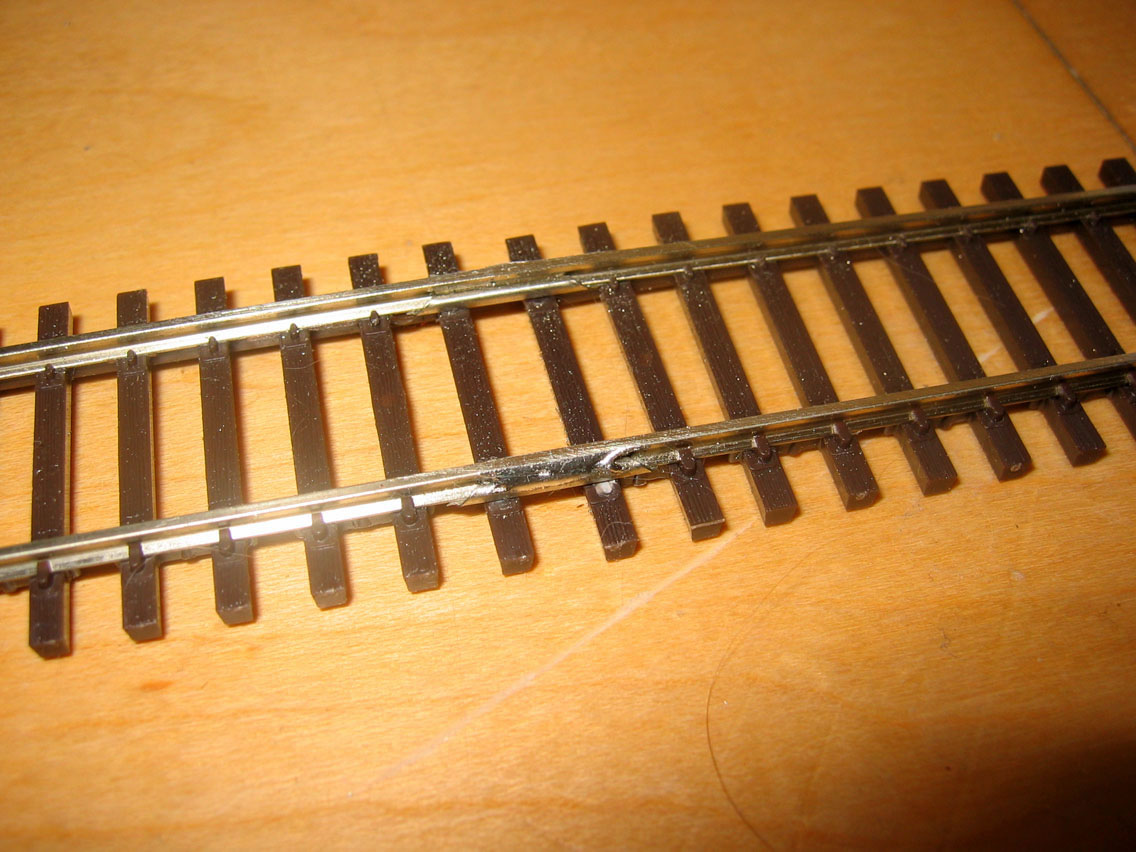
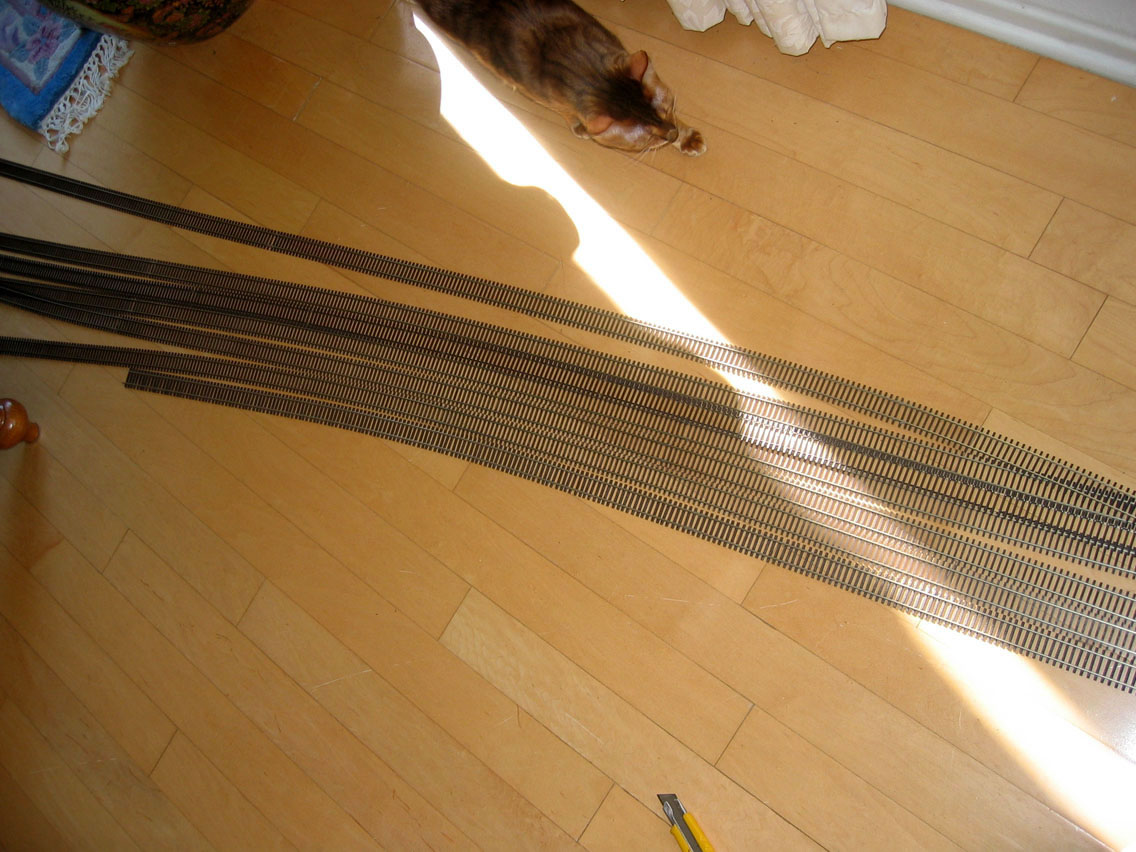
All the track was soldered together - everywhere.
I soldered it together in 9 foot sections before putting it
on the plexiglass, then each piece once installed. This was
a real life-saver as soldering it together was a pain in the
ass once it was 8 feet in the air. Soldering it together is
important since the furthest point is 45 feet away from the
control panel and track resistance can slow the train down.
On my set it does slow down and you can notice it - even being
soldered.
Here's a tip when soldering flexy-track on curves:
Solder it together straight, THEN curve it and put it into
place. If you solder it in place on an angle, it will have
a kink in it and your train will wobble at that spot. My track
has 3 kinks in it before I figured this trick out.
Supplies
San Diego Indistrial Metal Supply: www.imsmetals.com
(1" x 1/8" x 12 foot aluminum flat stock)
San Diego Plastics: www.sdplastics.com
(two sheets 3/8" Clear Acrylic. One sheet pre-cut into
10 strips 4.8" each)
Safety
A bit on safety with Plexiglass. Plexiglass
is easy to work with and acts like wood. It cuts like wood,
sands like wood and drills like wood. But unlike wood it heats
up. This is easy to forget as you're working with it, and
dangerous too.
If you get a piece of sawdust in your eye, it
disolves with your tear, and you can go get it out. No big
deal. But a small piece of acrylic from the jigsaw in your
eye is disasterous - hot sticky man made material stuck in
your eye!
Therefore, even though everyone knows about
safety, let's cover it just to make sure:
1) Always wear safety goggles. Not just
glasses.
2) Never touch the blade of your jigsaw or circular saw
after cutting. Even 3 minutes after cutting. For example,
if the blade gets jammed, or of it breaks off, or if you want
to change blades. It is easy to forget that plastic is not
wood - it heats up itself and everything it touches, and it
stays hot long after cutting.
3) Never touch the plastic after cutting - see above.
4) Flame-polish the acrylic in a well ventilated area.
5) Do not blow on the acrylic "sawdust" to clean
the surface or work area. It will get in your eyes and you
will cuss and swear and then you will make a webpage telling
everyone else not to do the same.
6) Always wear a mask when sanding acrylic.
The accident rates in industry for people working
with plastic is 2.4 times higher than those that work with
wood or metal.
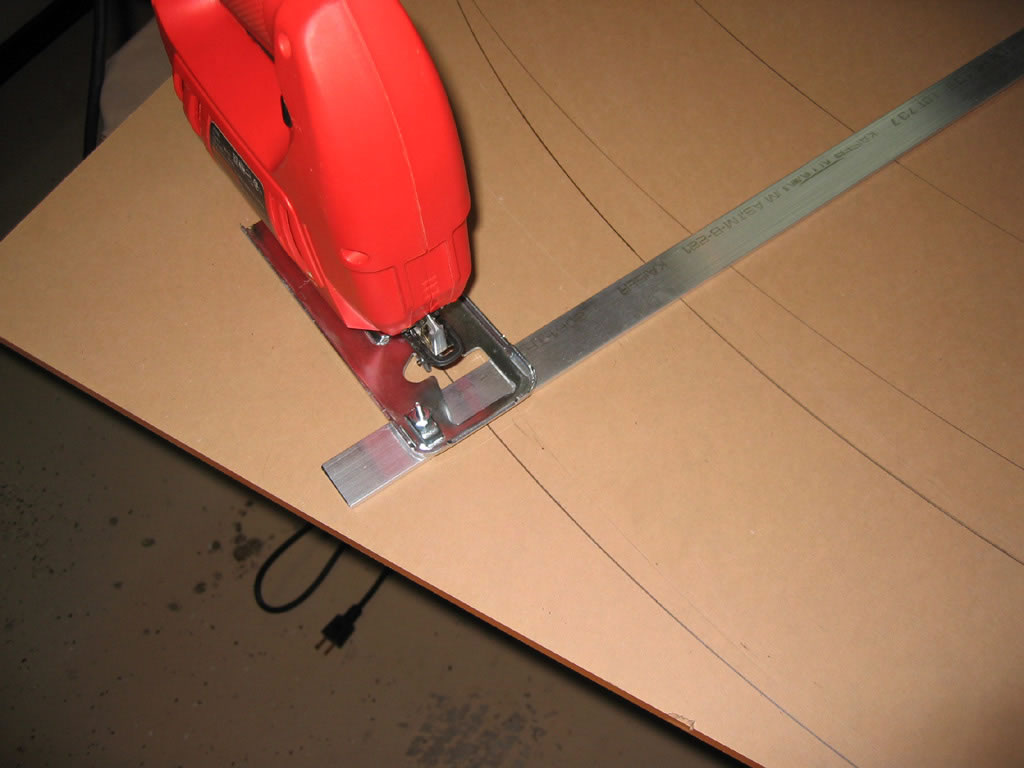
When cutting the plexiglass, I used my jigsaw
on the highest speed. I found that a low speed setting, while
pushing it though would cut faster, it would also chip the
plastic and leave an unsightly edge. So I switched to high
speed jigsaw setting with a very fine toothed blade. This
took more time to cut each piece, but left a nicer edge.
The opposite technique is to be used when drilling
plexiglass - use a slow drill setting, with very little pressure,
and move slowly through until the hole is drilled. This gives
a nice clean hole on both sides of the material. Place a block
of wood on the exit side when drilling, so the plexiglass
will not chip.
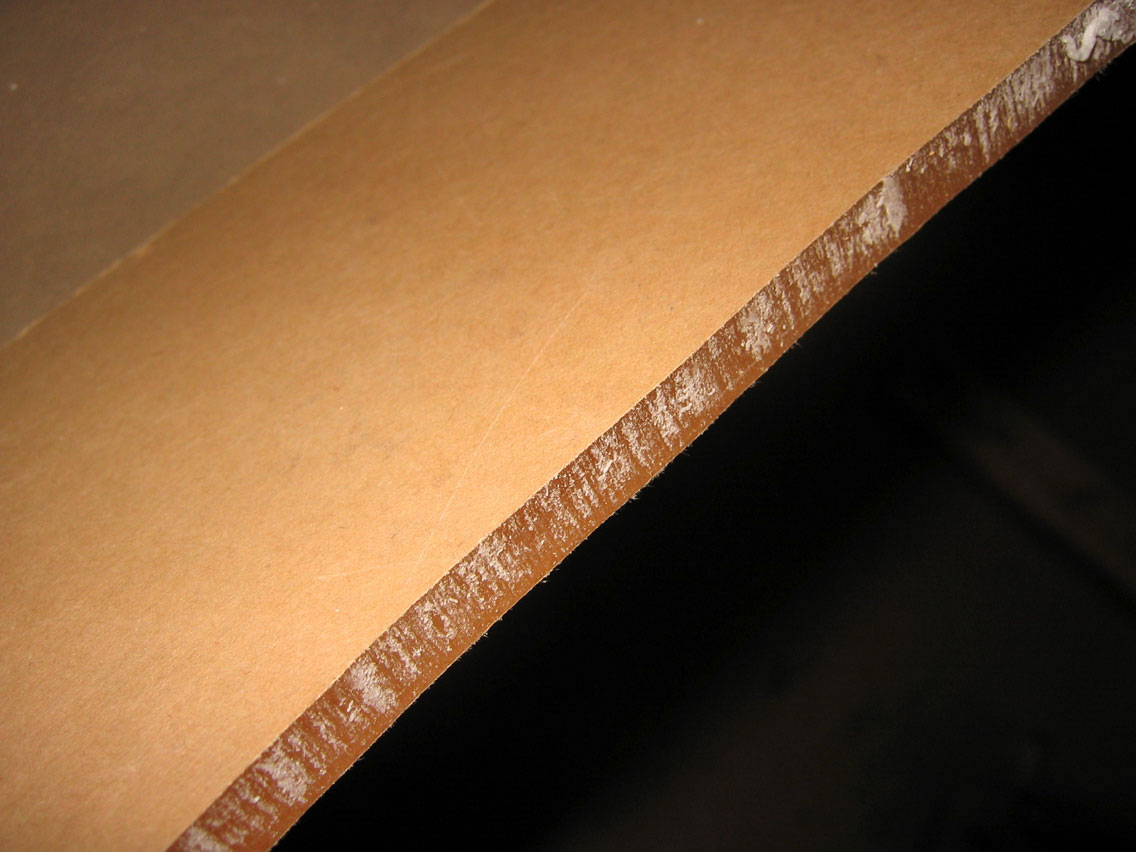
After cutting each piece, I belt-sanded the
edges with 60 grit, then 120 grit, and then flame polished
them to give them a nice professional looking edge. An orbital
sander is better, but I only have a belt sander. Flame polishing
is nothing more than taking a propane torch from Home-Depot,
and heating up the edges until it glosses over. This was much
easier than I thought, and left a really nice professional
finish to the Acrylic.
I practiced flame polishing
on a sample piece to get it right, but basically all you need
to do is sand it with 120 sand paper, then run the flame over
the edge. It is really easy once you get the hang of it.
The only issues were to make
sure not to hold the flame too long on a spot or it will catch
fire and bubble (ug), and also if you polish an area, but
it doesn't look good, wait until it cools before trying the
same spot again.
You can also use the torch
to get rid of any scratches that may occure on the surface
of the Acrylic while you're working with it. Just gently blow
the torch over the scratch and it magically disapears. Again,
don't hold it too long or the surface will ignite and bubble.
Make sure the surface is clean and oil free (from your fingers)
when you do this, or the oil will actually melt into the surface
and cloud the plexiglass.
When putting screws into plexiglass, always
pre-drill a hole. Unlike wood, plexiglass does not flex and
will not bore its own hole just by putting a screw into it.
Practice on a sample piece of plexiglass to make sure your
drill size is appropriate for your screw size, as there is
very little tolerance when putting screws into plexiglass.
I still don't
have a display case. - [email protected]
|